Installing Ubuntu in VirtualBox on Windows 10 is a very simple and easy process. In this guide, you will learn how to install ubuntu Linux on Virtualbox. There are many others ways to install Ubuntu Linux operating systems. You can install it erasing the entire hard disk (But keep in mind it will delete everything permanently on the hard disk, use this option when necessary).
Another option for you is dual boot, you can also install along with a window with dual boot, and during boot time you have the option to select the operating system to startup. Furthermore, you can also install it from Microsoft’s official play store but it will install only the command line interpreter of this OS like Windows DOS-OS.
If you don’t like these methods and are looking for a simple method to install Linux, you have a VirtualBox option. Virtual box provides the interface to install any OS on a guest operating system without making any changes to your current installed OS. This option is suitable for you if you want to learn Ubuntu Linux operating system or want to try it for limited use.
What is a Virtualbox and why should You use Virtualbox to install Linux?
Virtual box is free and open-source software developed by oracle. It provides a layer to install new operating system software on windows or any other host OS in virtual machines. VB provides the best interface to install Ubuntu, mint, or any other Linux version. You can install without affecting the already installed OS on your laptop. And it will remain along with the current installed windows 10 until you will remove it explicitly.
For a beginner, it seems a little bit complicated to install Linux on VB. By the way, it is not complicated anymore. You can install it very easily. I designed a very short, easy but detailed guide. I will walk through step-by-step details How to install Linux using VirtualBox on windows.
If you prefer watching the video, you can watch the video on How to Install Ubuntu on Windows 10 using Virtualbox :
Requirements to Installing Ubuntu in VirtualBox on Windows 10 :
- To download the Ubuntu ISO file and virtual box, you should have a good internet connection.
- At least 15GB disk space.
- At least 4GB RAM.
- Good processor.
In this article I will install ubuntu-18.04.3-desktop-amd 64, you can install any version of Ubuntu using the same steps.
Installing VirtualBox
To download VirtualBox follow this link and get the latest version for windows host.
1ST Step:
After downloading, Double click on the VirtualBox.exe file and you will see the following interface of VB. You will see the following VM installation setup. Click on the Next button.
Step 2:
Again click on the Next button.
Step 3:
Oracle VM VirtualBox let allows you to customize the installation. Setup according to your requirements or leave it by default.
4TH Step:
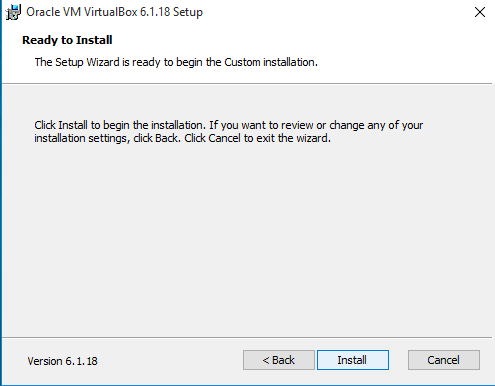
Now, it is ready to install. Click on the install button to install it.
Final Step:
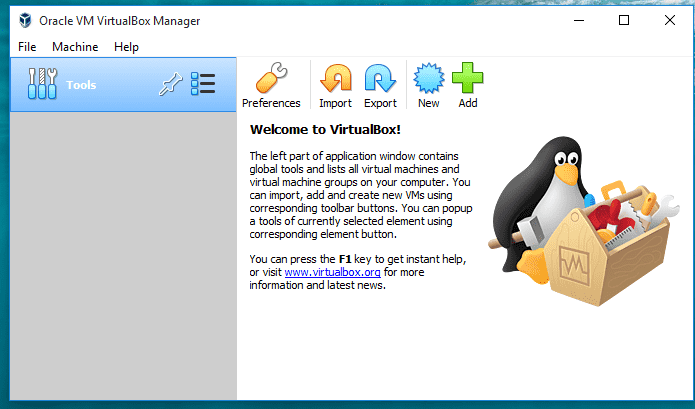
VM is installed and ready to use.
How to download Ubuntu ISO file?
To download the latest Ubuntu ISO file. Open your favorite browser and type Ubuntu. Click the first link with the title “Ubuntu Enterprise Open source and Linux”. When the page is open click on the download button from the menu. A drop-down menu will open. Choose the desktop version from that menu. The download page will open and click on the download button. Downloading will start.
Installing Ubuntu in Virtualbox on Windows 10
Now, it is time to install Ubuntu on VirtualBox.
Follow these steps.
Step 1:
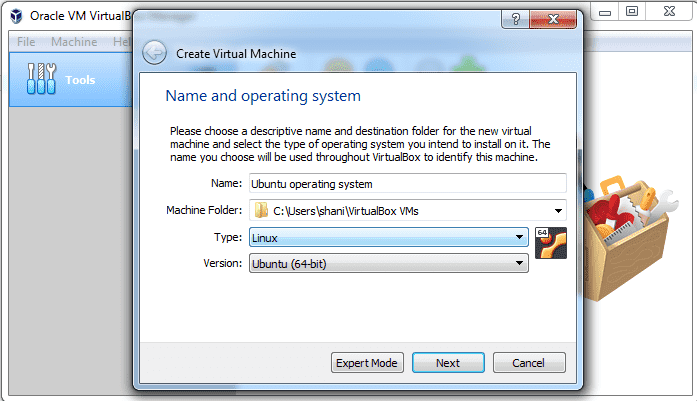
Open Virtualbox and click on new, alternatively press Ctrl + N. This type of window will open. In the first field, enter the name of OS, it should be descriptive, next choose Linux from the type field, and chooses Ubuntu (64 bit) from the version field and click next.
Step 2:
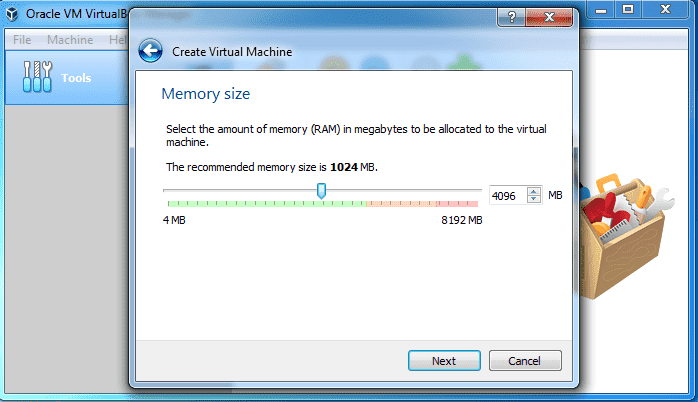
Now, it will ask how much RAM you want to allocate for the virtual machine. 1024 MB is recommended size by VM but to enjoy the good performance of VM. I will recommend allocating 4 GB RAM. After choosing memory size. Click on the Next button.
Step 3:
In this step, it will ask about virtual Hard disks. Leave it by default.
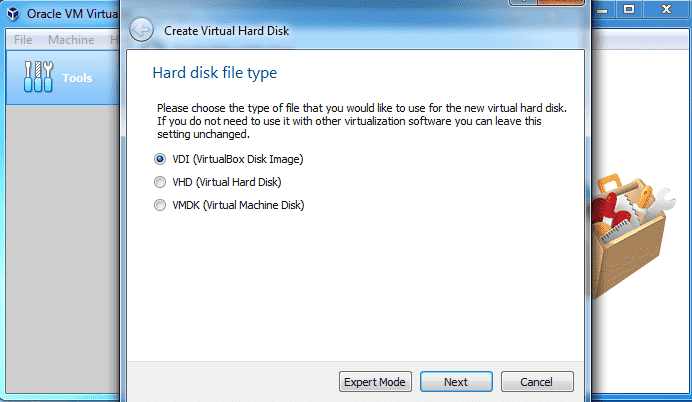
Step 4:
Here it will ask what type of storage medium you want to use for the hard disk. There are two types of storage medium, dynamically allocated and fixed size. In the dynamic medium you can increase and decrease the size of the hard disk but in fixed-size will be fixed. Click on next.
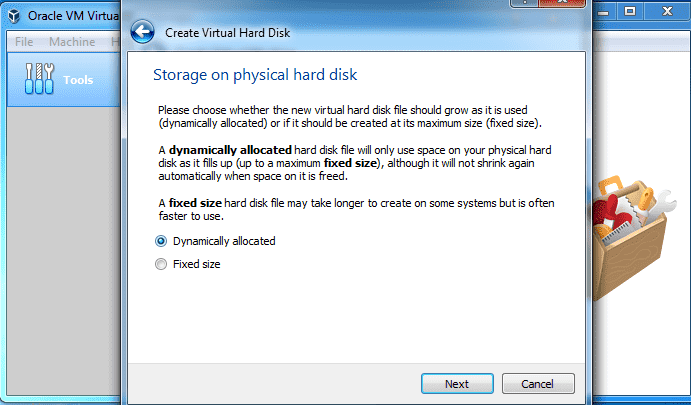
Step 5:
Allocate hard disk space. 10 GB size is recommended but allocate at least 20 GB for smoth work. And click on the create button.
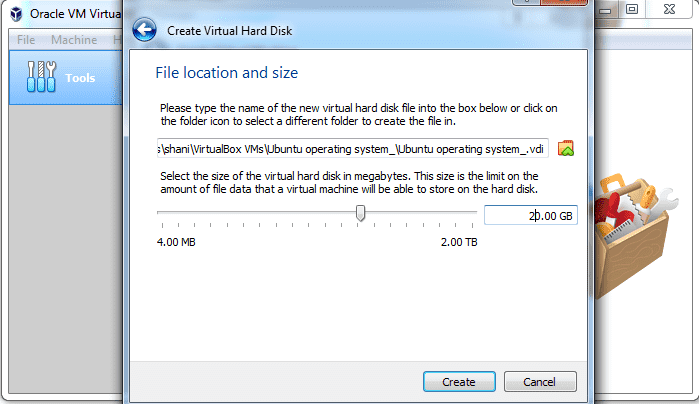
After creating it the display will look like this. Don’t click on the start button. Before clicking on the start button. You need to do something things more. Click on the setting tab.
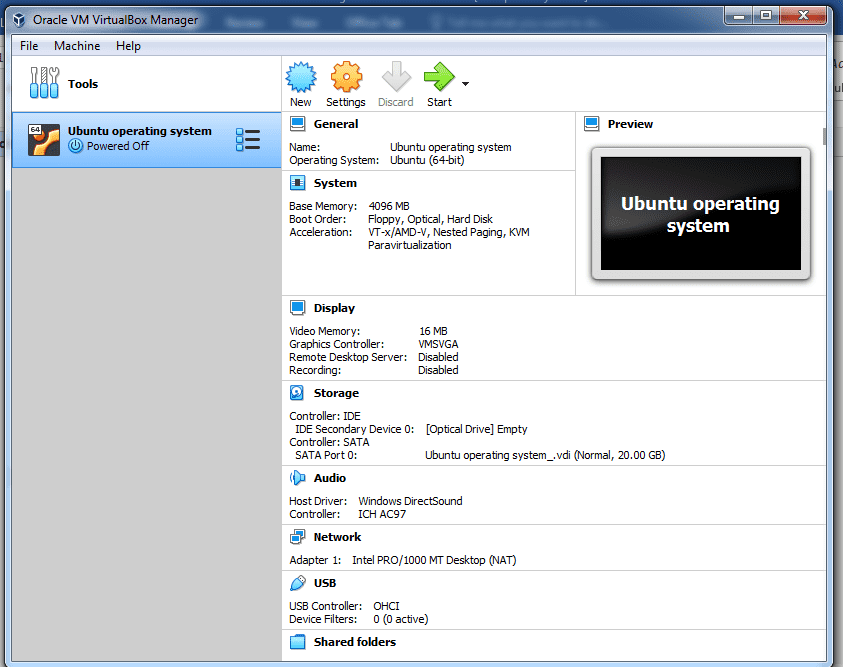
Step 6:
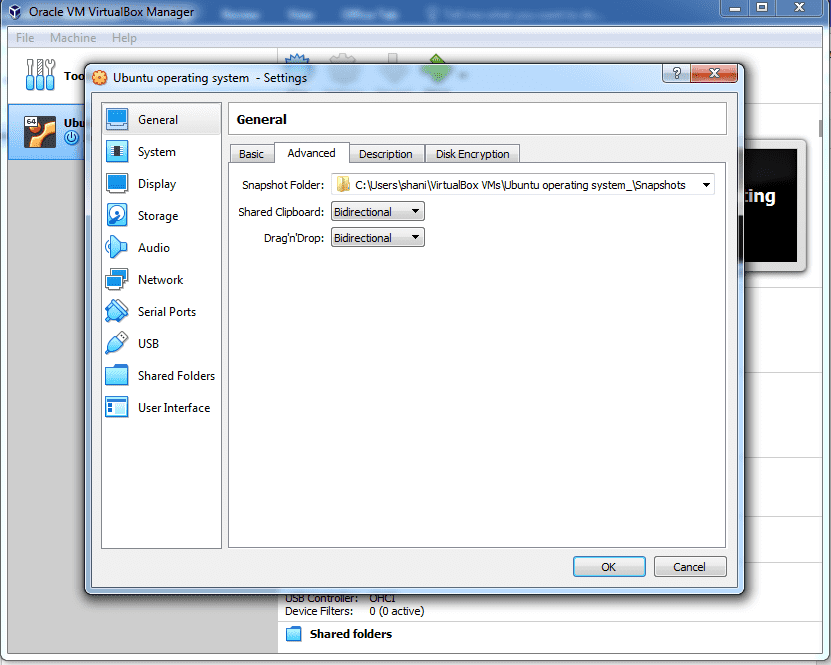
The setting window will open, from the setting window, click on the General tab. From the General tab, click on the advanced tab. Here you will find two options: shared clipboard and drag and drop option. Set them to bidirectional. With this option, you can transfer files from the host operating system to Ubuntu and Ubuntu to windows.
Step 7:
Click on the storage tab from the setting. And click on empty under controller: IDE. From the right side click on the disk icon and from the list click on choose a disk file. And choose the downloaded Ubuntu ISO file.
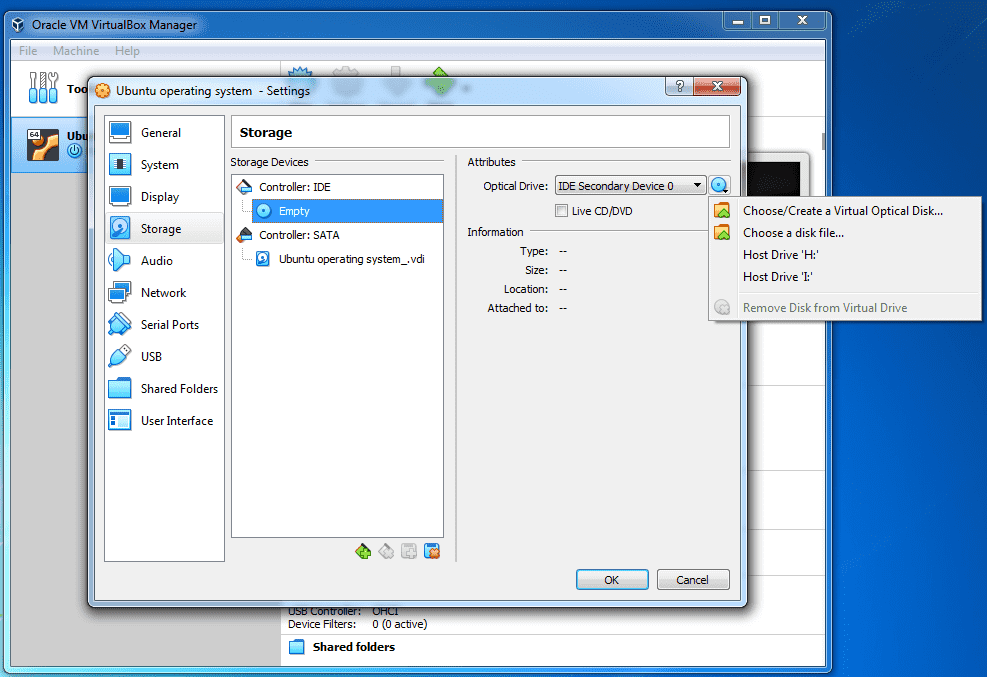
After choosing the Ubuntu ISO file click on the ok button.
Step 8:
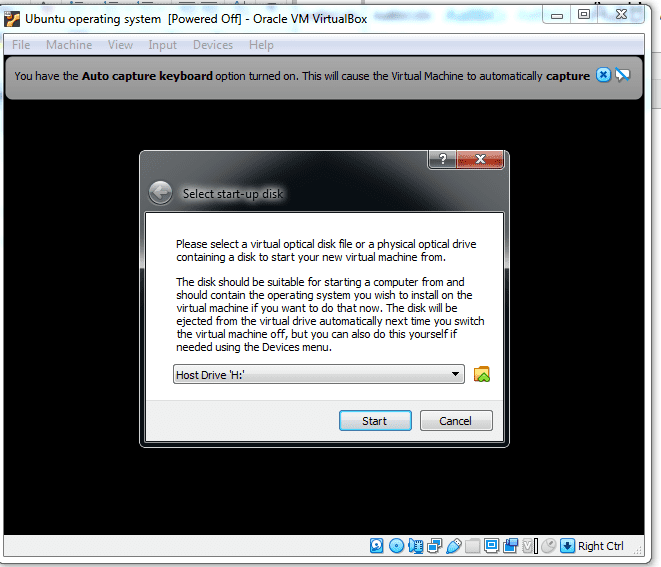
Now Ubuntu is ready to install. Click on the start button. It will take 1 to 2 minutes or depending on your system to ready the setup.
Step 9:
Ubuntu is ready to install. Click on Install Ubuntu or if you want to check it before installation, click on try ubuntu.
Step 10:
Select a language for keyboard layout and click on continue.
Step 10:
Ubuntu comes with pre-installed useful software, to install them select normal installation. If you don’t want to install them, click on minimal installation.
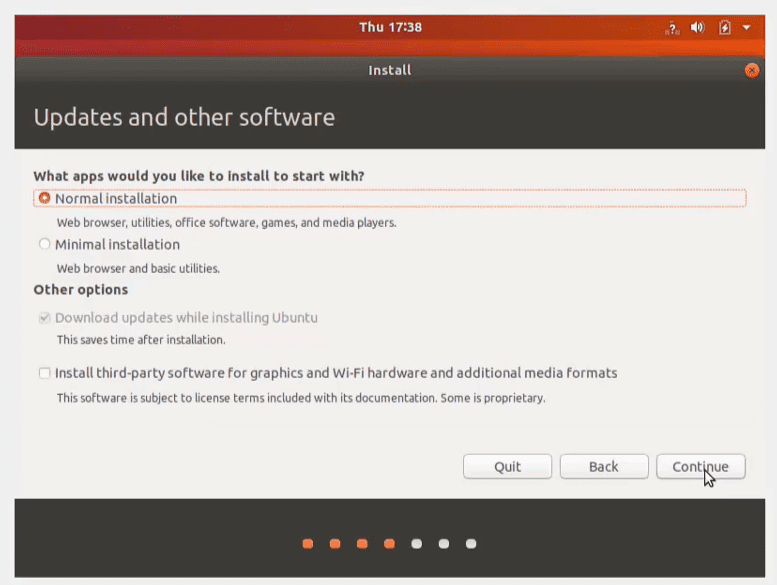
Furthermore, to install 3rd party graphics and Wi-Fi software, select the last option but make sure your internet should be contacted. Again click on continue. Note: If you don’t install these drives during installation, Ubuntu will install without drivers and then you will need to install them manually.
Step 11:
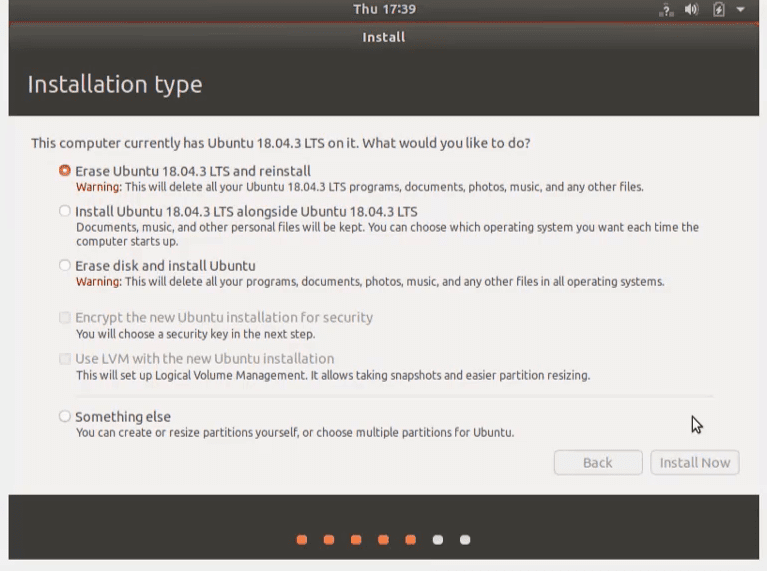
Select Erase disk and install ubuntu option, and continue. But keep in mind if you’re installing Ubuntu along with windows 10 with dual boot. Don’t choose this option; otherwise, it will delete the entire disk.
Step 12:
Select your time zone.
Step 13:
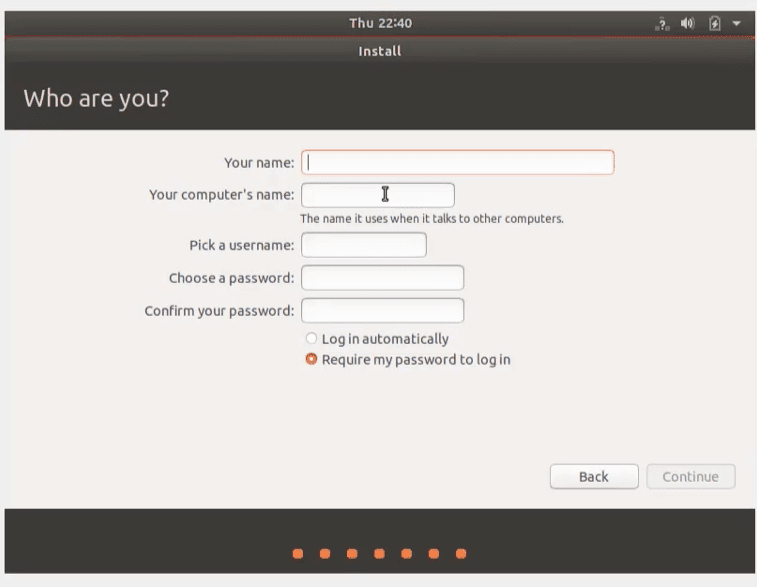
Enter your username and password. Further, there are two options at the bottom, choosing 2nd one will ask you to enter a password for login while choosing the first will login in automatically without a password.
Step 14:
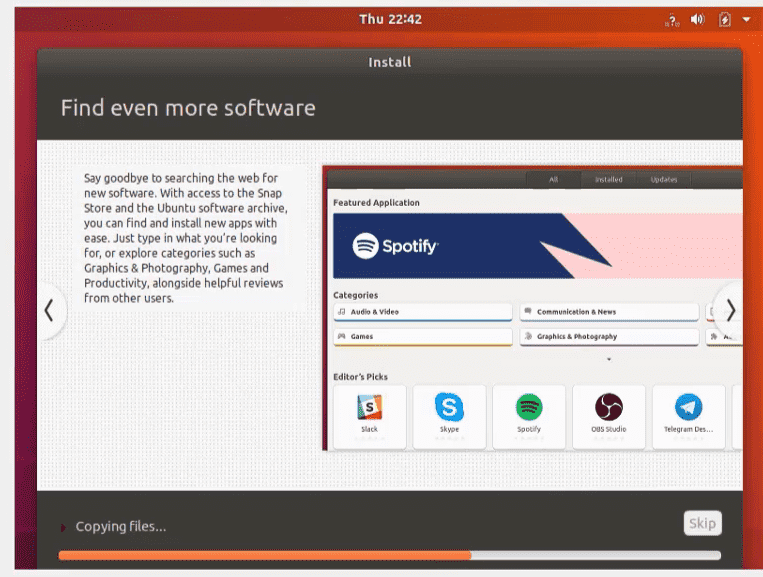
Ubuntu in VirtualBox is installing. It will take some minutes for installation. Just wait to complete the process.
Step 15:
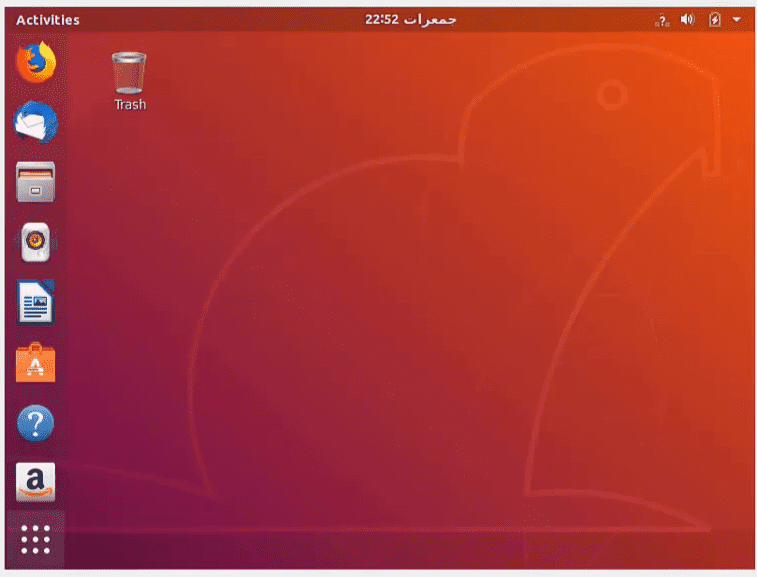
Finally, Ubuntu is installed on Virtualbox. Enjoy.
Final Words:
As you see, Installing Ubuntu in VirtualBox on Windows 10 is very simple and easy. First download VirtualBox and Ubuntu ISO files. From Ubuntu downloading page download desktop (LTS version). Then install VB and create a virtual setup for guest OS using VB. And follow all mentioned steps but if you still face any issue ask us. We will be glad to help you.
